Friday, January 31, 2014

Oh Gosh - one more STENCILED card for Friends with Flair


I've just loved this last week of really intentional work with my stencils.  Hopefully I will be able to keep it up and use them more regularly!  I'm starting out on the right foot by incorporating a stencil in my Friends with Flair card.

I used the SC Sunburst stencil and incorporated both inking and misting.  I first used a sponge dauber to add a pale yellow to the rays.  Then I went over that with some Dylusions ink spray.


I really wanted to accentuate the rays and tie them in with the stamped image which is a little darker, so I just freehand doodled some extra lines along the rays.

The image was stamped with Versafine and I added color highlights using a water brush.

I have to say the one thing I'm finding and loving is that in using stencils, I am able to make a really high impact card without a whole lot of work/time.

Thanks for coming by and have a great weekend!

Supplies Used
Paper/Cardstock:  CTMH - White Daisy and Black cardstock
Stamps:  Unity - Lightbulb Moment Itty Bitt
Ink:  Versafine; CTMH - Sunkiss Yellow, Honey, Chocolate
Other:  Dylusions - Pure Sunshine Ink Spray; Studio Calico - Sunburst mask; Ranger - Waterbrush; CTMH - Dimensional Foam Tape; Tombow - Mono Adhesive

Thursday, January 30, 2014

Another Dry Embossed Stencil Card


I liked making the stencil dry embossed card from the other day so much that I wanted to try it again. This time I used one of my Dreamweaver stencils.  Since these stencils are made of metal and thicker, you get a much deeper impression which I really love.

For this card I embossed the stencil twice.  Once for the background and a second time for the fussy cut umbrellas.

For the background I colored the umbrella with Salty Ocean and Iced Spruce Distress Ink.  Then I splattered some water over the top just because they are umbrellas and they should be rained on, right?


The red/pink umbrellas were colored with Pickled Raspberry and Iced Spruce and fussy cut.

I added a little strip of cardstock with a sentiment from a Sweet Stamp Shop set and then some clear sequins to finish it off.

I'm going to link this up over at Dreamweaver's too as they are still running their CAS challenge this month.

That's all for today!

Supplies Used
Paper/Cardstock:  Avery Elle - Fog cardstock; CTMH - White Daisy cardstock
Stamps:  Sweet Stamp Shop - Perfect Match
Ink:  Ranger - Salty Ocean, Pickled Raspberry and Iced Spruce Distress Ink; Memento - Tuxedo Black
Other:  Dreamweaver's - Umbrella Background; Neat & Tangled - Clear Sequins; Tombow - Mono Adhesive; CTMH - Liquid Glass

Wednesday, January 29, 2014

Let me tell you.....gossiping deer.... for Simon Says Stamp


Deer are the worst gossips!  Ha!

This is for this week's Simon Says Stamp Wednesday Challenge which was to create a card that is funny or humorous.

A fun mix of products here.  The journaling card is from Carta Bella's Hello Again collection.  The 'let me tell you...' is printed on the card and I added the 'really?' from Paper Smooches' Slang Gang set.

The little deer are from Lawn Fawn's Into the Woods set.  I created the second deer using the mirror stamping technique, colored them with Spectrum Noir markers and created some rolling snow covered hills for them to stand in.

This card does make me chuckle whenever I look at it and I think it's a perfect 'girlfriend' card.

Supplies Used
Paper/Cardstock:  Carta Bella - Hello Again 12x12 Collection; Avery Elle - Maple Wood Grain Cardstock; CTMH - White Daisy and Sky cardstock
Stamps:  Lawn Fawn - Into the Woods; Paper Smooches - Slang Gang
Ink:  Memento - Tuxedo Black; CTMH - Pacifica
Other:  Spectrum Noir Markers; CTMH - Dimensional Foam Tape; Tombow - Mono Adhesive

Tuesday, January 28, 2014

Stenciled Day 4 - Dry Embossing with Stencils


One of the techniques showcased Day 4 was dry embossing with your stencils and then leaving the stencil over the embossing and inking the pattern.

This is actually one of those things I've been wanting to try and haven't gotten around to (partly because I haven't been able to locate my embossing mats.....I went deep sea diving last night in the craft room and finally located them).

I'm using one of my all time favorite stencils for this one.  Julie Balzer's Peacock Stencil by from The Crafter's Workshop.

After embossing I used Iced Spruce and Evergreen Bough distress inks.  Since the stencil is pretty detailed, I just inked up the very edge of my foam tool and used that to color the stencil, starting with the iced spruce in the center and then inking from the outside of the pattern in with Evergreen Bough.


I love the color combination and the image, and didn't want to add much else to the card.  I added some soft distressing with the Iced Spruce on the edges and a sentiment and that was all that was needed.

Supplies Used
Paper/Cardstock:  Avery Elle - Fog Cardstock; CTMH - White Daisy cardstock
Stamps:  Waltzingmouse - Fancy Feathers
Ink:  Ranger - Iced Spruce and Evergreen Bough Distress Ink; Hero Arts - Soft Granite
Other:  The Crafter's Workshop - Peacock Feathers 6x6 Stencil; Tombow - Mono Adhesive

Monday, January 27, 2014

Stenciled Day 3 - Resist


Sharing my day late card for today.  One of the techniques covered yesterday in class was using translucent embossing paste as a resist.  I don't have any translucent embossing paste, but I did learn a while back (on accident) that gesso will resist dye inks.

The only catch is that gesso is thinner and more paint like than paste, so if you are going to use gesso for this technique, I suggest a stencil that doesn't have big spaces and very thin sections of stencil separating the spaces....this could lead to spillage from one section of the stencil to another and since gesso resists, you spillage will be very evident.

I chose to use Tim Holtz's alphabet mask specifically because the negative stencil spaces are very narrow and less likely to cause a mess.  I was also pretty diligent in taping down the stencil.

Note, it also takes gesso a significantly longer amount of time to dry than modeling paste, so plan to step away for a while.

Once my gesso was dry, I added color using Festive Berries Distress Ink and Black CTMH ink.  Then I used a baby wipe to remove the excess ink.  The gesso does pick up a slight tint, so it's not pure, pure, white.

I decided to go pretty CAS for this one, die cutting the Paper Smooches Thanks die out of my stenciled piece as well as a piece of black cardstock.  I saved all the negative pieces from the stenciled die cut so I could add them back into the spaces of the black die cut to create that inlaid look.


I did end up having to run my die/panel through the machine multiple times to get a cut because the extra texture/uneven surface with the gesso plus the fact that the cardstock had lots of distress ink in it seemed to make it a little softer.

A little banner with a secondary sentiment finished this off.

I'm committing myself to one more stenciled post tomorrow for Day 4 of class, but I may go back and tackle some of the other techniques from the first couple days of class later on in the week too.

Hope your week got off to a good start!

Supplies Used
Paper/Cardstock:  CTMH - White Daisy and Black Cardstock
Stamps:  Paper Smooches - Many Thanks
Ink:  CTMH - Black; Memento - Tuxedo Black; Ranger - Festive Berries Distress Ink
Other:  Tim Holtz - Schoolhouse Layering Stencil; Paper Smooches - Thanks die; Claudine Hellmuth - Gesso; Tombow - Mono Adhesive; CTMH - Dimensional Foam Tape


Sunday, January 26, 2014

Stenciled Day 2 - Watercolors


Dropping in today to share another stenciled card.

One of the techniques from Day 2 (yesterday) was to create a stenciled background using watercolors.

I thought I would take that a step further and make the watercolored stencil the focal point instead of just the background.

I pulled out my Inktense pencils and started by painting a light wash of blue over the entire panel.  To speed things up, I used my heat gun to dry the panel.  Then I placed this Dreamweaver's Lotus Background stencil over top.  I wanted to create a scene rather than an allover pattern, so you can see that I only colored in a portion of the stencil.


Once I had the stencil taped down, I went in with my paintbrush, pulling color directly from the Inktense pencils and colored in selected portions of the stencil to create a scene.

The sentiment, from Verve, was stamped with Versafine, and to soften the transition from the main panel to the card base I added a vellum mat.

This was so easy and really a quick card to make.  I'm going to link it up over at Dreamweaver's as their CAS challenge is still going on.

Thanks for stopping by, come back tomorrow for another Stenciled card!

Supplies Used
Paper/Cardstock:  Watercolor Paper from Target; Avery Elle - White Cardstock; Recollections - Vellum
Stamps:  Verve - Grace Plain Jane
Ink:  Versafine
Other:  Derwent - Inktense Pencils; Dreamweaver's - Lotus Background Stencil; Tombow - Stamp Runner

Saturday, January 25, 2014

Stenciled Class - Day 1


I'm happy to be participated in the Stenciled class at Online Card Classes.  The class started yesterday, and I was able to get one card done last night using a technique that Jennifer McGuire shared.  I'm hoping to do one card a night for the next week or so, so be prepared for lots of stenciled cards!

The technique Jennifer shared involves rotating/shifting your stencils to create different patterns.  It's a really great way to stretch your supply of stencils.

Now I happen to have a lot of stencils, but I was surprised when I was looking for a stencil to use that I really don't have many that are an even all over pattern/symmetrical.  This is the stencil I ended up using.


You'll notice that it doesn't take up the whole width of the card, but I thought it would kind of work out in terms of a fade in/fade out with the new pattern in the center.

I'm pretty pleased with how it turned out.  I kept it really simple, just added a sentiment and some sequins.

That's all for tonight.  We have literally been on the go all day, so I've got to get to work if I'm going to get a card done tonight.

Supplies Used
Paper/Cardstock:  Avery Elle - White, Sapphire, and Raspberry Cardstock
Stamps:  Mama Elephant - Smitten
Ink:  Ranger - Pickled Raspberry and Salty Ocean Distress Inks; CTMH - Pacifica
Other:  Studio Calico - Chevron Stencil; Neat & Tangled - Translucent Sequins; Tombow - Mono Adhesive; CTMH - Dimensional Foam Tape and Liquid Glass

Friday, January 24, 2014

Go See Do


Just popping in quickly to share a card made using a journaling tag.  This one comes from Basic Grey's Capture collection.  The white pennant where I added the sentiment alphas actually covers up a list of favorite destinations.  I added a strip of cardstock at the top to anchor it, but the main feature of the card comes from some fancy cutting.

I used my craft knife to carefully cut along the skyline.  The bottom portion was then adhered with dimensional adhesive.  I love the depth that it adds to the card.  It's a little painstaking, but definitely worth it.


That's all for me today.  My to do list this weekend is as long as my arm, I hope I survive it!  Hope that you have a great end to your week!

Supplies Used
Paper/Cardstock:  CTMH - Colonial White and Cocoa Cardstock
Other:  Basic Grey - Capture Carte Postale Snippets; AC - Amy Tangerine Baxter Transparency Stickers, Nutmeg Thickers; CTMH - Dimenaional Foam Tape; Tombow - Mono Adhesive

Thursday, January 23, 2014

Thanks for SPARKS Anything Goes Challenge


It's another Anything Goes week for Paper Smooches SPARKS challenge, and this really is an Anything Goes card for me as I stamped on paper towel for this one.  What do you think?  Weird, or cool?  I've got mixed feelings on this one, but I think it's kind of cool.

I used pigment inks from CTMH for the flowers/leaves and Smokey Grey Versafine for the sentiment.    You really need to use pigment inks because dye inks will bleed too much.

The paper towel is pretty sheer, so I added a piece of white cardstock behind, cut just a bit smaller.

Short and sweet today.  We are finally getting back to a 'normal' routine after our snowfall this week. Schools are open today albeit two hours late.  Hope that you are having a great day!

Supplies Used
Paper/Cardstock:  Avery Elle - Kraft and White Cardstock; Paper Towel
Stamps:  Paper Smooches - Calico and Simply Said
Ink:  CTMH - Adventure Mini Pigment Ink Pads; Versafine - Smokey Grey
Other:  Tombow - Mono Adhesive

Wednesday, January 22, 2014

you & me for SC Sunday Sketch


I found myself in rare circumstance yesterday morning:  Home Alone.

Ellie was off of school for a teacher workday, so my parents took the girls Monday night and were going to keep them Tuesday.  That allowed Andrew and I to go on a date, and sleep in a little.  Mother Nature was on my side as by the time I woke up, work was cancelled for me, and the girls were still out at my parents.  I called them to tell them to go ahead and bring them back before the snow got too bad, and then decided to try and get a layout done.


This might be the fastest layout I have ever done.  That's partly because I already had a plan.  As soon as I saw the Sunday sketch at SC this week, I knew which photo I wanted to use.


This is one of the professional photos taken from my little sister's wedding in July.  Carina loves to look at me with a deep stare and then bring her forehead to touch mine.  It's like a little kiss, always in the moment, and something that I never would have been able to photograph on my own, so I am grateful that the photographer was able to capture it.

I stayed very true to the sketch, kind of mentally assigned sizes to the different boxes based on the bottom right hand one, which I decided would be 4" x 3".

The hardest part of the layout was picking out the papers.  I pulled out several different collections to get the right fit, and was trying to create balance by using visual triangles with the main colors.

No embellishments on this one, just pretty papers and a sweet photo.  To get the heart just right, I put a piece of scrap vellum over the photo and sketched the heart, erasing and adjusting until I was happy with it.  Then I layered my good piece of vellum over that heart, traced it and cut it out.


I always have issues with how vellum is adhered. I didn't want it to sit flat here, I wanted some movement so I just stitched it on at the top.

The sentiment was cut with my silhouette portrait.

Thanks for coming by!  Hope that you are having a wonderful week!

Supplies Used
Paper/Cardstock:  Basic Grey - RSVP collection (used both 6x6 and 12x12 papers); Pink Paislee - Portfolio 6x6 papers; Little Yellow Bicycle - Poppy 6x6 papers; GCD Studio - Special Delivery Collection; October Afternoon - Travel Girl 8x8 pad; CTMH - White Daisy and Slate Cardstock; Recollections - Vellum
Other:  Silhouette Portrait and LD Mosquito font; Tombow - Mono and Multi Mono adhesives; AC - 05 Black Journaling Pen; Sewing Machine

Tuesday, January 21, 2014

A Note of Thanks


Just a pretty card today using Carta Bella's Hello Again collection.  The little notebook piece is one of the cards from the sheet of journaling tags in the collection.  I cut it out and used my Crop-o-dile to cut the holes and then scissors to create the perforations.

The stamps are all WPlus9.  I actually die cut the banner directly from the journaling card and then stamped onto the die cut.  You can see I didn't get it quite centered the first time I stamped the outline, so I stamped it again and used a water brush to blend it a little and add some dimension/shading before I stamped the sentiment.

Th flowers/leaves are from Fresh Cut Florals, I die cut a bunch of pieces, stamped them, and then arranged them around/beneath the banner before adhering them all in place.


Just a hint for using Fresh Cut Florals.  The flowers/leaves you see are never the first ones I stamp.  I always pull more colors than I will use on the finished card, and use a scratch piece of paper to sort out the color combinations/generations of stamping, etc. before I start stamping on my die cuts.  Then I use the scratch sheet as a guide when when I am stamping....helps me keep everything straight in my head.

Hope that you are having a great day!

Supplies Used
Paper/Cardstock:  Carta Bella - Hello Again Collection Pack; Avery Elle - White Cardstock
Stamps:  WPlus9 - Fresh Cut Florals; Basic Banners
Ink: CTMH - Cocoa, Topiary, Ruby, Gypsy
Other:  WPlus9 - Fresh Cut Florals and Basic Banner Die; WRMK - Cropodile; Ranger - Waterbrush; Tombow - Mono Adhesive; CTMH - Dimensional Foam Tape

Monday, January 20, 2014

On the Corner Blog Hop Winners!

Hey everyone!

Thanks to everyone who hopped with us last week, your comments were so appreciated!

I've got two winners to announce with the help of Random.org:

First commenter #30 from the Neat & Tangled blog:

Jeanne J

Second, commenter #47 from Wida Miller's blog:

ValByDesign, Valerie

Congratulations ladies!  Jeanne J, please contact Danielle at Neat & Tangled with your address and she'll get your set to you.  Val, please shoot me an email with your address and I'll send your set.

And I just realized that On the Corner is out of stock again!  Thank you guys so much for your support!  We'll have new sets in stock very soon.....and some coordinating sets too.....;)

Friday, January 17, 2014

A few more SC CHA Challenge Cards


I was planning to try a few different challenges, but I got sucked into Challenge #4 - to use a kit 2+ months old to create a project.  I went and looked and my old Studio Calico kits and realized that I had never ever used a single bit of my Sock Hop card kit.  Oops.

So, I buckled down and decided to just spend a couple hours with the kit/challenge and see what I could make.  I ended up with three cards, and I still have enough kit to make many more.  I also challenged myself to use only the kit, with the exception of ink/adhesive, and I'm pretty happy with the results.

Of course I had to make sure to get a birthday card in.


This one is a little more modern for me.  I thought about trimming down the green panel so that it's flush with the card, but I like the angles you see, so I kept it as is.


And this was just a little fun with piecing.


Thanks for coming by, have a great Friday and long weekend!

Supplies Used:  Studio Calico Sock Hop Card Kit; Memento - Tuxedo Black Ink; Tombow - Mono Adhesive; Xyron - 1 1/2" Sticker Macker; EKSuccess - Foam Squares; Tim Holtz - Tiny Attacher

Thursday, January 16, 2014

SC CHA Challenges


There are some CHA challenges going on over at Studio Calico, although they close today, so you need to hurry if you want to play along.

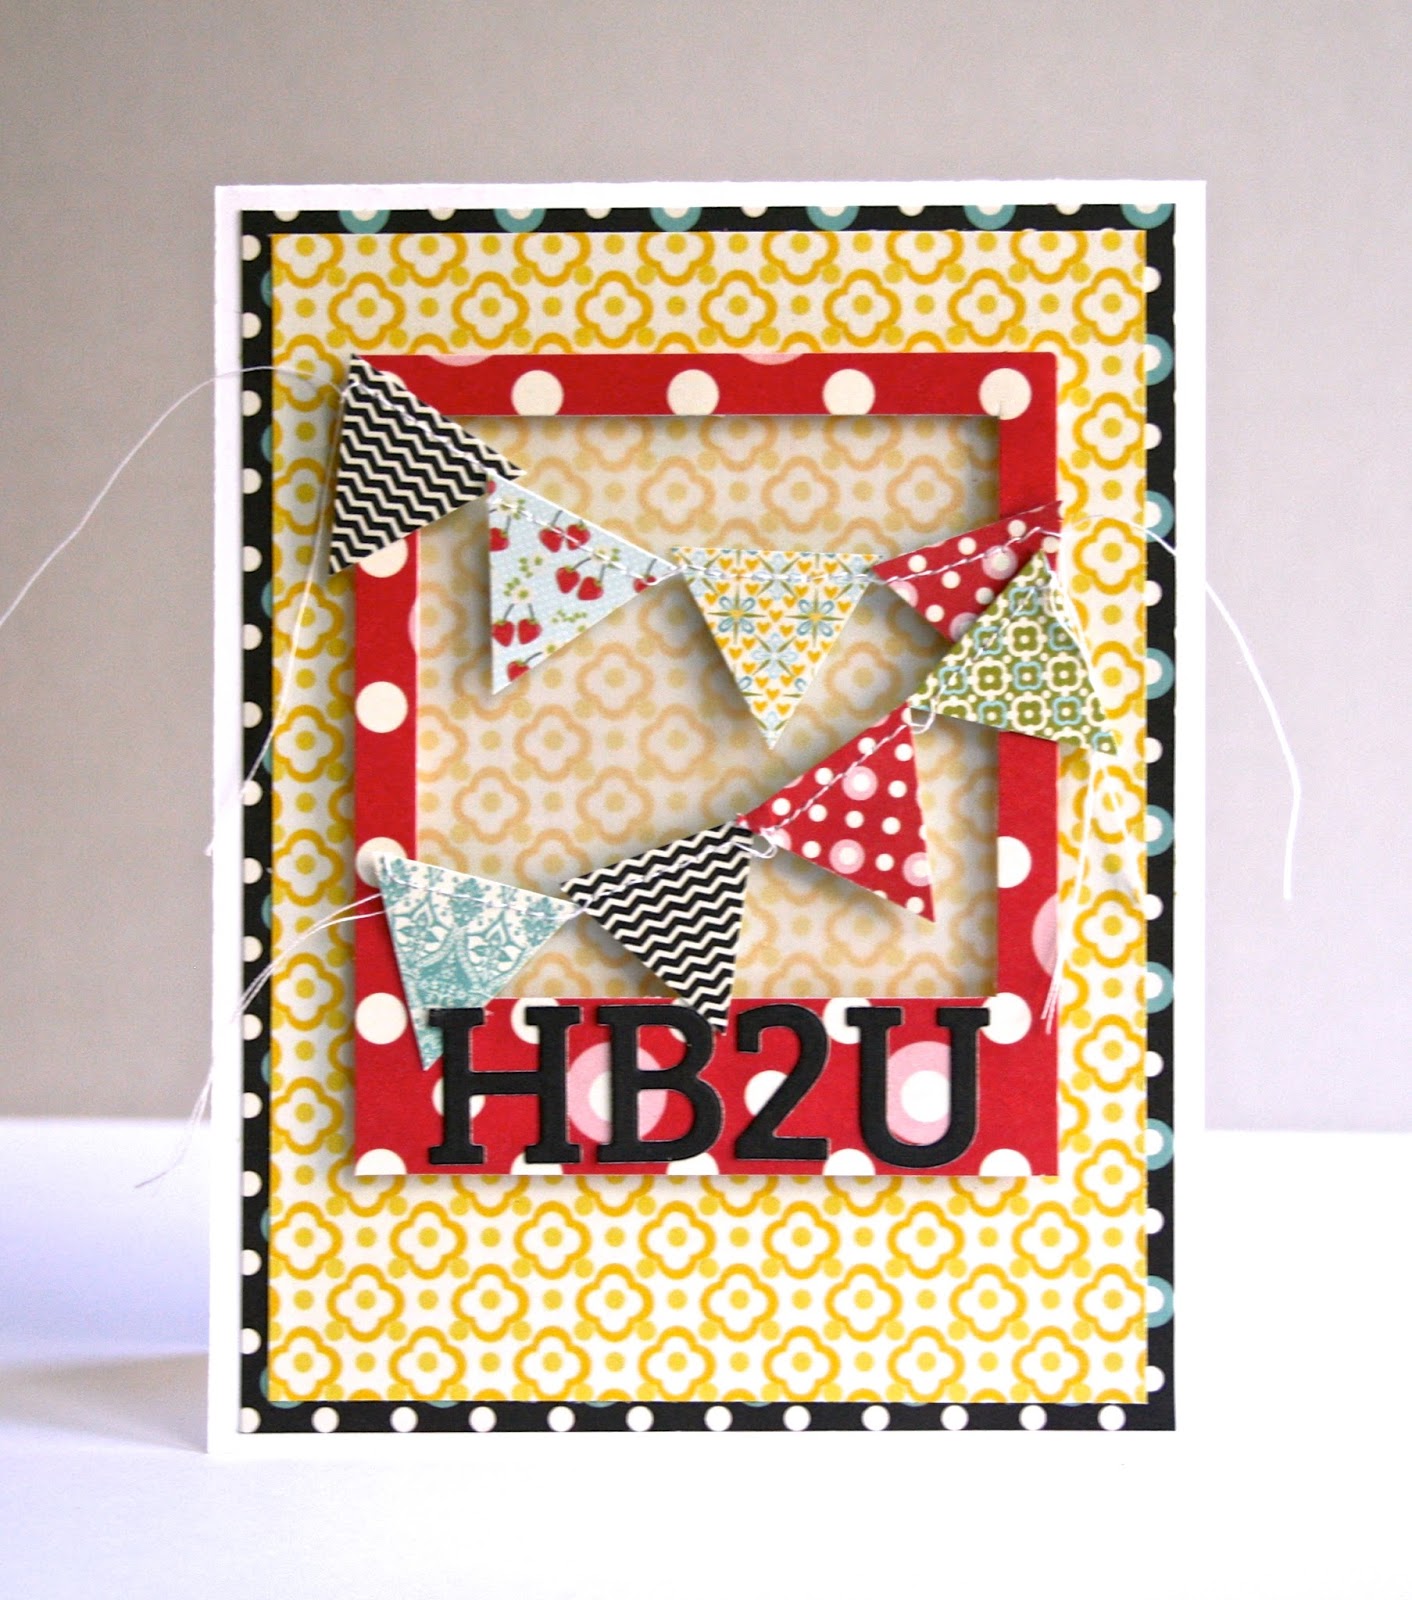
My first project is for the card sketch.


I used the BG Clippings 6x6 pad.  The main panel is a piece of very thin striped paper that I laid a Dreamweavers stencil over and lightly sponged.  Since I really love that stencil image, I wanted the panels in the card to be very subtle.  I cut three pieces of vellum, ran them through my Xyron and adhere them over top of the stenciled paper.


I used a bold color for the pennant pice in the back and kept it square because I think that fits this CAS card a bit better.  Another sheet of patterned paper as a mat and some sequins/patterned and vellum circles finished this off.  Sitting those pearl sequins inside the larger ones adds a bit of interest and adds just a touch of color as opposed to if the entire larger colored sequin was showing.

I'm going to link this card up over at Dreamweaver's also, they have a CAS challenge this month.

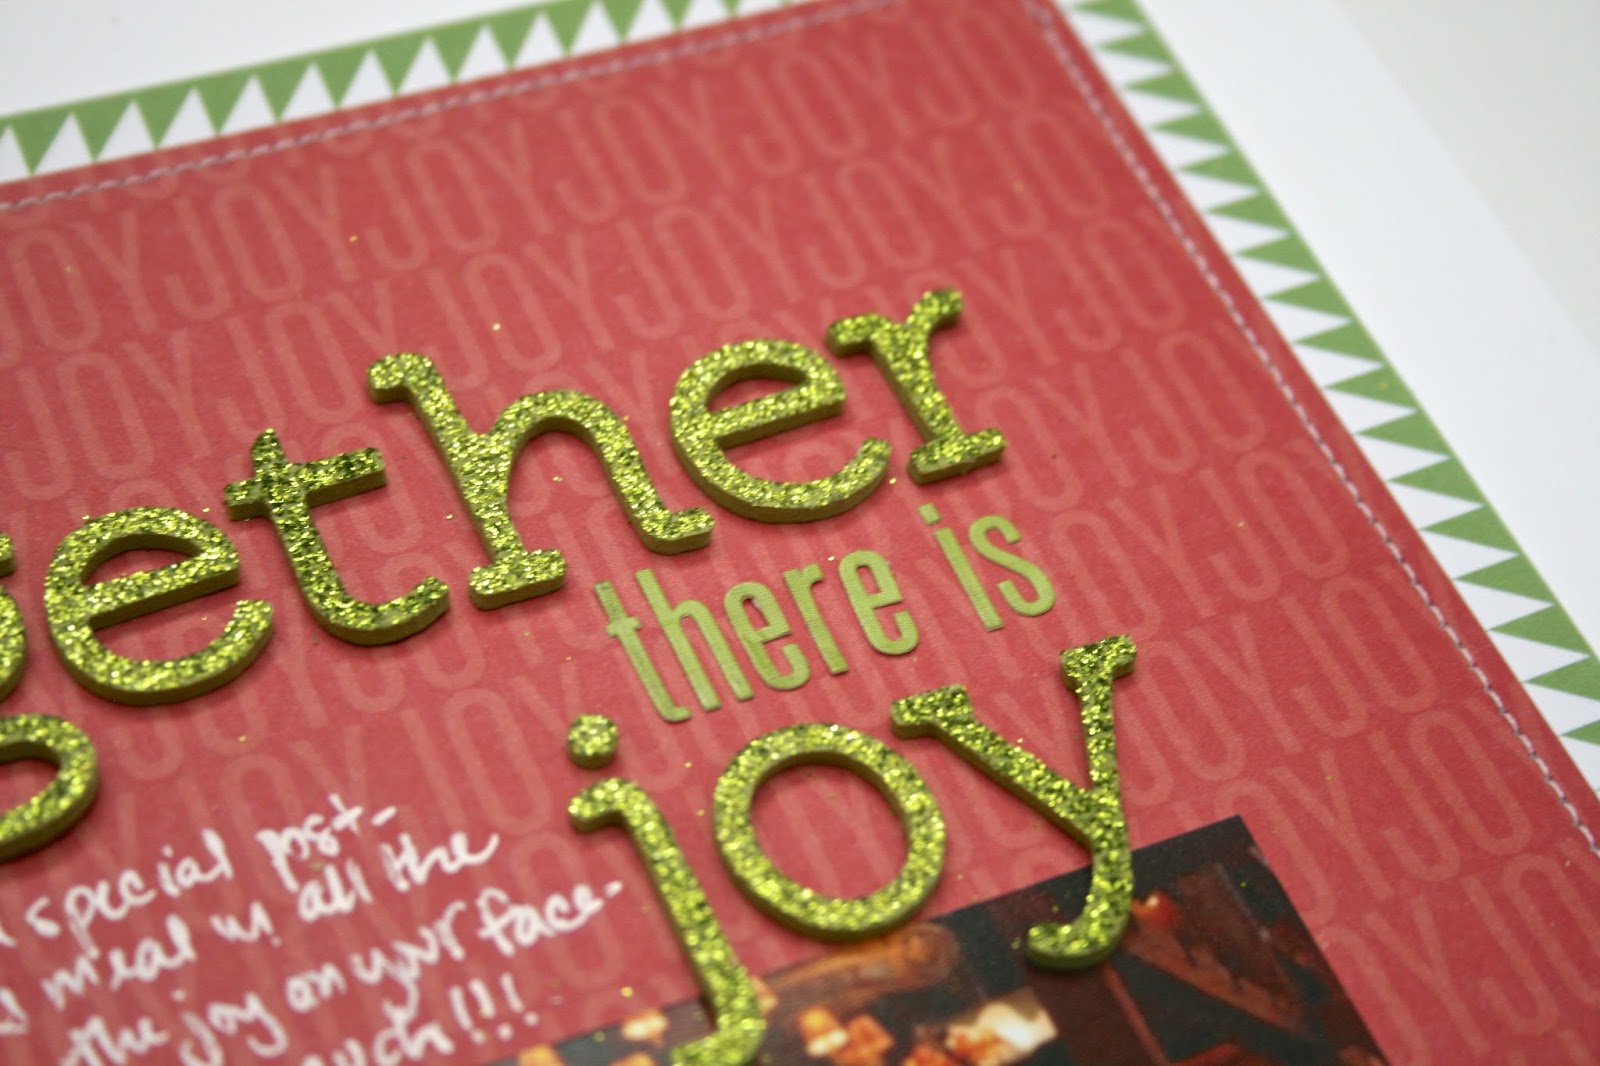
Next a layout.  This challenge was more for Project Lifer's, to use a photo taken with their phone, but since I don't do PL, I just went with a traditional layout, hopefully that counts.  


These photos were taken with my iPhone back in March when we were visiting Andrew's family.  Andrew ran track in college, so we stopped by to check out the new facility.  The girls of course had a great time trying it out and Ellie had to lay down in Lane 5 (as she was five at the time for a photo op).  Ellie says she wants to run when she gets to high school (Andrew is a coach), she also says she wants him to be her Social Studies teacher and that they will ride to school together everyday.  I need to record these things....

Anyway, this is a mishmash of BG papers (there's some Carte Postale, RSVP, and Persimmon), a little vellum, and some Elle's Studio.  For the tabbed paper I just traced an Elle's tab tag and cut it out.  really easy.  I kept this one really CAS.  I thought about stitching, but my bobbin is almost out of thread, and for some reason I hate to be bothered winding bobbins, so when that happens I tend to avoid my sewing machine.

OK, that's all for today.  Have a wonderful day!

Supplies Used

Card
Paper/Cardstock:  BG - Clippings 6x6 Pad; Avery Elle - Silver Fox Cardstock; Recollections - Vellum
Stamps:  Mama Elephant - Filigree
Ink:  Versafine - Smokey Gray; CTMH - Juniper
Other:  Dreamweaver's - Tree Line Stencil; Lawn Fawn - Into the Woods Sequins; CTMH - Liquid Glass; Tombow - Mono Adhesive; EKSuccess - Dimensional Adhesive

Paper/Cardstock:  BG - Persimmon, Carte Postale, and RSVP collections; Recollections - Vellum
Other:  Elle's Studio - Penelope Frames; BC - Carte Postale 12x12 Collection Pack Alpha sheet; AC - Amy Tangerine Hello Thickers, 08 Black Journaling Pen

Wednesday, January 15, 2014

Guest Designing for Top Dog Dies, and a Giveaway

***Scroll down for the On the Corner Blog Hop


I'm excited today to be guest designing for Top Dog Dies.  

Top Dog Dies is a new online store that offers their own brand of wafer-thin and steel-rule dies, along with dies from brands you already know and trust, including My Favorite Things, Sizzix, Savvy Stamps and Cheery Lynn Designs. Top Dog Dies is also the leading U.S. retailer for Tattered Lace, a new line of intricate dies designed by U.K. designer Stephanie Weightman.

I have a couple cards to share with you here on my blog and another project over at Top Dog's blog.  

My projects here feature the Madison Doily die, it's a beautiful, detailed die.  I wanted to use the same card design/layout and create two cards that show it with two very different looks.

The first card is a little bit more complex and detailed.  I used patterned papers from Lily Bee Design's Destination collection.  I love that you can see the pattern peeking through the die, just adds another layer of detail and complexity.  

The embellishments are from Dear Lizzy's 5th & Frolic collection which my very sweet blog friend Sandy sent to me.  I added a bit of Lawn Trimmings twine around the tree trunk.

Lots of dimension on this one.


Here's a very CAS scaled back version of the same card design.  I love how striking the die is against the plain cardstock.  I added some thickers for the sentiment and a bit of seam binding.  This one sits very flat and would be great for mailing.


Be sure to head over to the Top Dog Dies blog to see my other project.  Here's a little sneak:


Oh, and about that giveaway.  Top Dog Dies is generously sponsoring a $50 giveaway.  


For additional entries:

Leave a comment on this blog post.
Follow Top Dog Dies on any of the following:
Facebook: https://www.facebook.com/topdogdies
Pinterest: http://www.pinterest.com/topdogdies/
Instagram: http://instagram.com/topdogdies
Twitter: https://twitter.com/TopDogDies

Giveaway will close Sunday 19 January 2014.


Tuesday, January 14, 2014

RCC89 - Happy Birthday

****For the On the Corner Blog Hop scroll down


Hey everyone!  Here to share my card for this month's Ribbon Carousel challenge.  There's a little bit of everything here.  Make a love card, a birthday card or a get well card.  I chose birthday and inked up a new set I recently got from My Favorite Things.  Isn't she cute?


A very simple card.  I really wanted to work on my coloring.  I was a little bit nervous about the hair when I bought this set, but she is just so sweet, I persuaded myself to go for it.  She is colored with a combination of Spectrum Noir markers and Copics (the reds are Copics and the rest were Spectrum Noir).

The sentiment is actually a single line, but I did a little masking to to make it a two liner.  I added some fun pom pom trim to the bottom as well as some sequins to break up the white space on the card.

So make sure to play along, you have plenty of time, and a random participant will win a set of spools with the winner's choice of seam binding, baker's twine or May Arts ribbon.  

Thanks for coming by, hope you are having a great day!

Supplies Used
Paper/Cardstock:  Crafter's Companion - White Cardstock; Avery Elle - Aquamarine Cardstock
Stamps:  My Favorite Things - Wendy Burn's Designs Best Friends, Celebrate Big
Ink:  Memento - Tuxedo Black
Other:  Copics; Spectrum Noir Markers; May Arts - Black Mini Pom Pom Trim; Neat & Tangled - Red Sequins; Tombow - Mono Adhesive; CTMH - Liquid Glass

Monday, January 13, 2014

On The Corner Blog Hop


Hey everyone!  I'm so excited because today Danielle at Neat & Tangled and a bunch of my crafty friends and I are holding a blog hop featuring my On the Corner stamp set.

On the Corner has been out of stock for several weeks, but expect to see it back on the shelf at Neat & Tangled very soon, like by the end of the week soon.

The hop starts at Neat & Tangled, so if you are just starting here you'll want to make sure to swing back to N&T to see what Danielle created.

Of course there are prizes.  Danielle and I are both offering up an On the Corner set, so that's two chances to win.  Winners will be randomly chosen from comments left on each of the hop stops.  Comments close on Saturday, and winners will be posted Monday.

There were no rules for the hop, just make something amazing, and I just know that these ladies are going to knock it out of the park!

For my card I wanted something very bold and graphic with an almost comic book type styling.  I used one of my Crafter's Workshop stencils to create that bold print piece.  First I blended ink onto some white cardstock and then I placed the stencil over top and used a sponge dauber to add the black.


The sentiment makes me giggle a little.  I kind of love this sentiment pairing and I'm pretty sure we all know someone this card would be perfect for.

I decided to make a second card with one of the journaling cards I created during release week.

Just a very CAS design.  The image was stamped in Versamark and colored with distress inks and a water brush, and I used Lawn Fawn alpha dies, but Thickers would be another great way to go on something like this.

Thanks so much for coming by!  Your next stop is Elena, and here's the hop order in case you get turned around.

Jocelyn (http://www.redballooncards.blogspot.com/)
Joscie (http://www.cutchens.com/)
Nina (http://waffleflower.com/tag/neat-and-tangled/)
Wida (http://beachorado.blogspot.com/)

Friday, January 10, 2014

Friends with Flair - Thinking of You


Yesterday I pulled out my new Inktense pencils and tried them out.

I thought this Unity image would be the perfect one for my first project.

I first added a soft wash to the background by applying water to the base piece and then adding some very watered down color.

The image was stamped in Versafine and then colored by just pulling color off of the pencil tips with a brush.  Once that was done I added the horizon line and stamped the sentiment.

I do love how bright the colors are, can't wait to use these again!

Have a great weekend!

Supplies Used
Paper/Cardstock:  Watercolor paper from Target; Avery Elle - Silver Fox Cardstock
Stamps:  Unity - Country Side Blooms Itty Bitty; WPlus9 - Fresh Cut Florals
Ink:  Versafine
Other:  Derwent - Inktense Pencils; Tombow - Stamp Runner

Thursday, January 9, 2014

Together there is Joy


It really is so nice to get back to some scrapbooking.  I came across these photos the other day and really wanted to get them on a page, and here you have it.

I used the Magical collection, those strips around the main piece are cut from one of the papers.  You could easily use washi as a frame too, but I think it's easier to line up/get things square with paper.  When I try doing stuff like that with washi I always end up having to pull it up and put it down a bunch of times.


I cut a couple doilies down to create the banner portion at the bottom, stitching along the top and then looping the excess threads around and adhering them with some gems.


I used a bunch brads that I have had for ages to accent the doilies as well.


Really a very simple and clean layout, but I love it.  This is actually from two Christmases ago.  It's hard to get photos with Andrew and often even harder to get myself in photos as I usually have the camera.  These came from my older sister, and I'm so glad that we have them.

Now, I gotta start thinking about THIS year's Christmas photos....

Supplies Used
Paper/Cardstock:  AC - Magical Collection; CTMH - White Daisy cardstock
Other:  AC - Eclair Glitter Foam Thickers; Lily Bee - ABC Stickers; OA - Make it Merry Designer Brads; EP - This & That Decorative Brads; BoBunny - Elf Magic Jewels; Tombow - Mono Adhesive; Sewing Machine; White Gel Pen

Wednesday, January 8, 2014

Three with Lily Bee


This year I'm trying to get into my stash and use some of it up.  I have a bad hoarding habit and I need to get stuff out and not be afraid to cut into papers, so yesterday I pulled out the Lily Bee Sweet Shoppe collection to make some cards even though I was saving it for scrapping.  It's a really sweet and pretty collection, and I challenged myself to do at least two cards with the same papers.  This first one features the Jenni Bowlin's Quilt Star Punch.


I punched a bunch of stars and stacked using the front side of the paper on top and the backside on the bottom, and turned the star on the bottom so that it looks more like a sunburst that a quilt star.  A little bit of stitching was added to accent them.

I scored the cardstock to create a grid and placed one star in each grid.  The sentiment piece is one of the stickers that comes with the collection.  I popped it up with foam tape and added some Lawn Trimmings.

Some SC wood veneer stars finished off the top and bottom stars.


For my next card, I used the exact same papers, cutting them into 2" by 1/2" strips and arranging them above and below the center of the card.


I knew I was going to stitch them on, so I just tacked them in place and then stitched around.  The alphas come in the kit also.  So simple and easy and now I've got another birthday card for Andrew's students.


I figured I would make one more birthday card while I was at it and challenged myself to make one with a different look and feel.  I went brighter, funkier, and bolder for this card.


I love that there are some black patterned papers in this collection as I think they are a great contrast with the other papers.  The little pennants were cut from the pennant patterned paper and then stitched together on the sewing machine.  I added a bit of vellum under the polaroid piece to soften the background paper so that the banners stand out a bit more.


It's been COOOOOLD here, and it was fun to pull out some bright, summery papers to play with.

Thanks for stopping by, hope that you are doing well and staying warm and safe where you are!

Supplies Used
Paper/Cardstock:  Lily Bee - Sweet Shoppe Collection; Avery Elle - Silver Fox and White Cardstock; Bazzill Card Shoppe - Peanut Cluster Cardstock; Recollections - Vellum
Other:  Lily Bee - Sweet Shoppe Collection Alphas and stickers; Studio Calico - Wood Veneer Stars; Lawn Fawn - Natural Cord Lawn Trimmings; Tombow - Mono Adhesive; CTMH - Dimensional Foam Tape, Liquid Glass